Studio
SuperBOL Studio OSS: A New Platform for COBOL
![]()

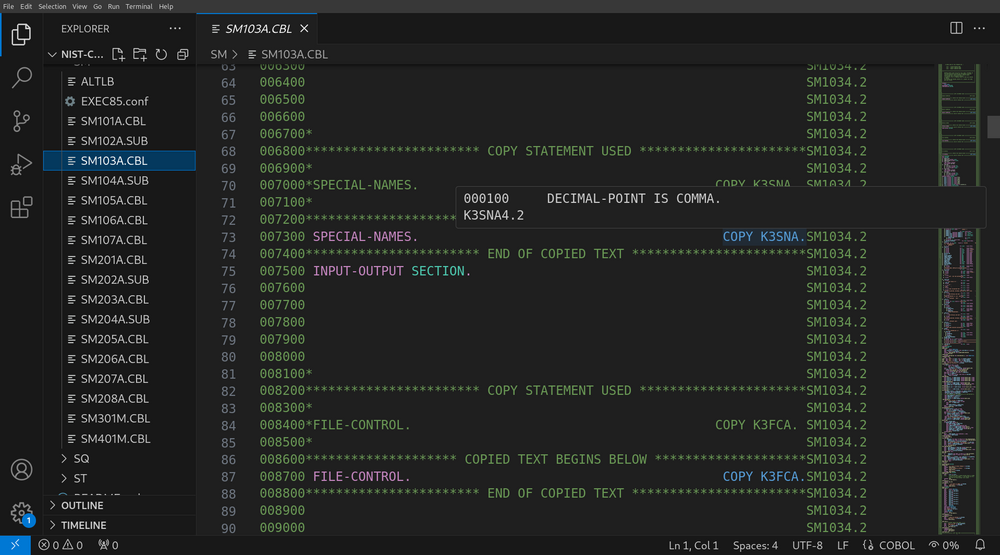
Visual Studio Code extension for COBOL.
Getting started
Requirements
This extensions assumes that version 3.2 of GnuCOBOL is available on the system running VS Code. Debug features additionally assume that gdb is installed.
Installation
You can install SuperBOL Studio OSS either directly from within VS Code, or via a VSIX file.
Installation within VS Code
First, click on the “Extensions” icon in the activity bar on the
left-hand side, or press
Ctrl+Shift+X. Then, type “superbol”
into the search bar to find it, and press its Install button.
You can find further instructions for installing extensions directly within VS Code on this page.
Installation via a VSIX file
First, download a VSIX file from the Marketplace or Open VSX.
To install the extension from its VSIX file, open VS Code and go to
the the “Extensions” view. In the sidebar, click on the three dots
(⋅⋅⋅) on the top right-hand side (just above search), select
Install from VSIX…. Pick the VSIX file you just downloaded to
install it.
Configuration
This extension should work out-of-the-box on Windows systems where
GnuCOBOL has been installed using one of the dedicated installers
(available ???). This should be the case with standard
installations on Linux as well—e.g, if GnuCOBOL is installed in
/usr/local or /usr.
If the extension shows errors like “Configuration file … not found”, you may need to set the
COB_CONFIG_DIRenvironment variable to the directory shown by:cobc -i | grep COB_CONFIG_DIRYou may need to restart VS Code (or your session) so the extension reloads properly.
Editing an existing project
To start using the extension on an existing project, open its folder
in VS Code (File > Add Folder to Workspace…). The extension will
start automatically whenever the folder contains files with usual
COBOL filename extensions (.cob, .cbl, .cpy, .cbx).
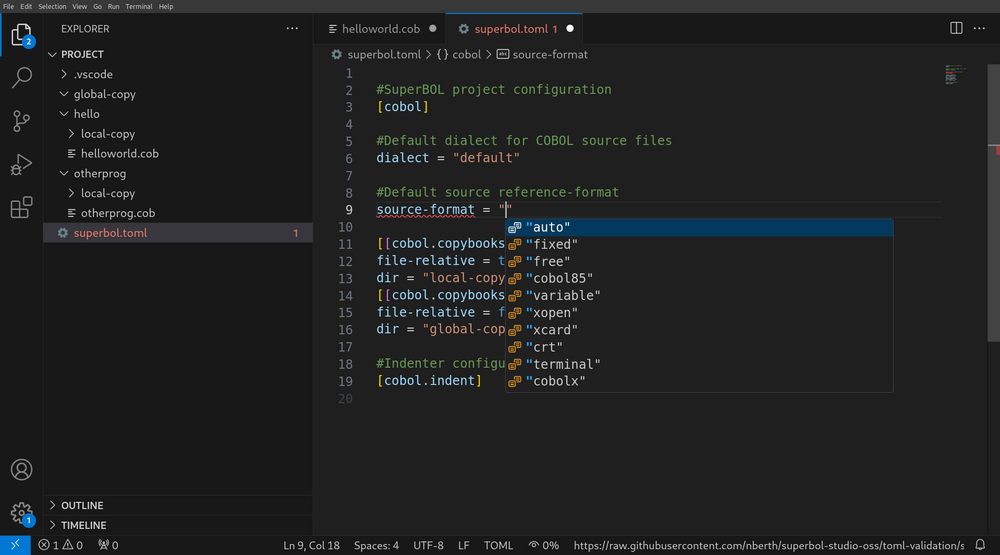
Then, open the settings (File > Preferences > Settings, or
Ctrl+,), and start typing “superbol…”. You will
be presented with a screen that resembles:
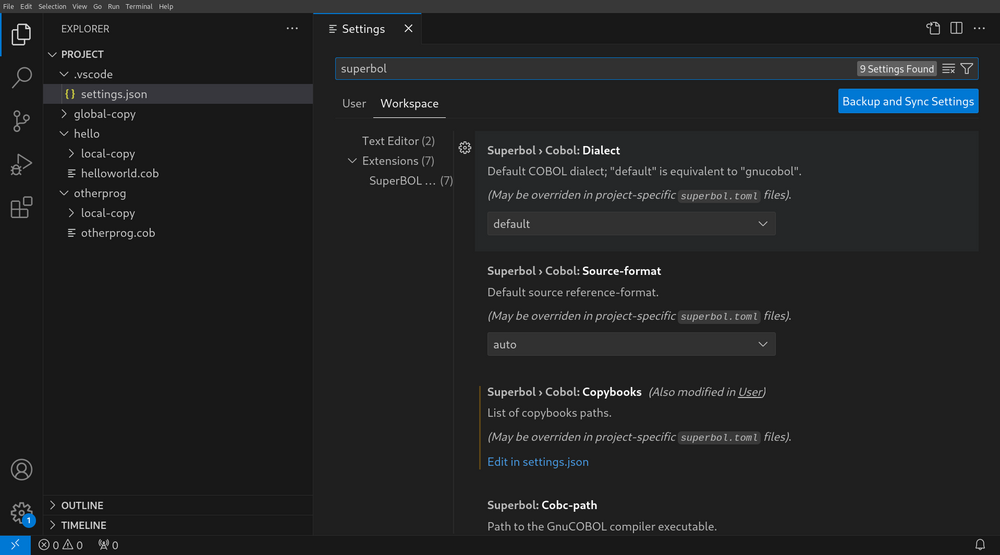
From here, you can notably configure:
-
The COBOL dialect used in the project (see here for a documentation on every available dialect). In SuperBOL, the
defaultdialect corresponds to GnuCOBOL’s default, that supports many features from dialects such asCOBOL2014,IBM,Micro Focus(mf), orGCOSfor instance; -
The default reference source-format (see here for a documentation on the supported source formats). When
autois selected, which is the default, SuperBOL (and GnuCOBOL) will automagically try to guess whether the source is infreeorfixedformat. Other source formats need to be configured explicitly. -
The path to copybooks. To configure this setting, you will need to select
Edit in settings.json. This is a list, where each entry describes an element of the search path where your copybooks will be looked for. Each entry must contain a directory namedir, and may feature an optionalfile-relativeflag. When absent or set tofalse, the latter field indicates that the directory name is either absolute, or relative to the root of the project’s directory. Whenfile-relativeistrue, the element of the search path is considered relative to the directory where each main source program is located.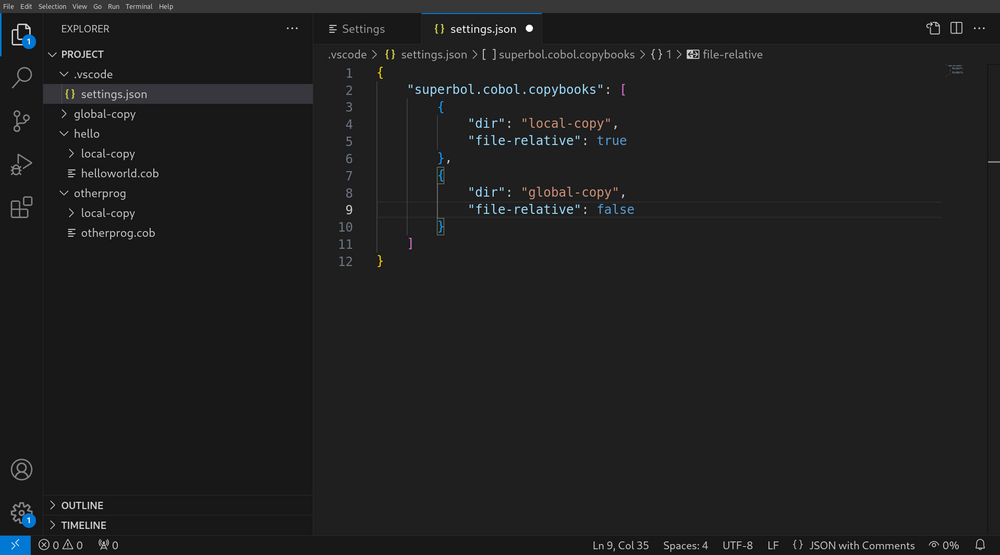
Syntax diagnostics
Syntax checks performed by SuperBOL Studio currently cover the
COBOL85dialect, and some constructions of more recent dialects supported by GnuCOBOL. Reporting of such diagnostics is currently disabled to avoid misleading developers with false diagnostics about syntax errors.
Navigation features
Go to Definition
When you want to locate the definition of a data item name in your
source code, position your cursor on its name, right click, and
select Go to Definition (or press F12).
Peek Definition
To only have a peek at where such a data item defined, you can
position the cursor on its name, right click, and select Peek > Peek Definition (or press
Ctrl+Shift+F10). You will then be
presented with a view of the location of the corresponding definition,
including if it lies in a copybook.
Go to References
If you want to obtain a list of all references to a named data item,
right click and select Go to References (or press
Shift+F12). You will then view the location of
every reference to this item.
At the moment, definitions that belong to some sections of the data division, and some references to data items, are ignored by the extension. They will be covered by the first stable release.
Hover to Show Copybooks
Ever wondered what was behind a COPY directive? Just position your
cursor over such a statement, and you will be presented with the
contents of the copybook.
Hover to Show Source Text Replacements
What’s more? You can see the source text that results from
replacement by a REPLACE directive in the same way.
Debugging
In order to debug a COBOL program, you first need to configure a dedicated build task with appropriate debug options. Once this is done, you can launch the compiled program into a debugging session.
Setting up a Build Task for Debugging
After having opened the program to debug, select Terminal > Run Build Task… (Ctrl+Shift+B),
Configure Build Task…, and then SuperBOL: build (debug).

Save the task.json as shown. Definitions for this task notably
include a for-debug flag, that instructs the compiler to insert
debug annotations into generated executable files, as well as
extra-args, that can be edited to pass additional arguments to the
cobc compiler.

Launching the Compiled Program for Debugging
If needed, you can place a breakpoint on statements (or paragraph
titles in the procedure division) by clicking on the red dot that
appears when you hover the cursor on the left margin (or with
F9). Click on the red dot or press F9 again to
remove a breakpoint. Then, to launch the program in debug mode,
select Run > Start Debugging (F5). This will run your
program until a first breakpoint if reached, or to completion.
Once stopped on a breakpoint, you can investigate the values of data
items from the program using the VARIABLES panel on the left-hand
side.
Press F10 to step to the next statement, or F5 again to continue until the next breakpoint, or termination of the program.
Miscellaneous
Collaborating with other developers
At this point, the settings for your project are stored and managed by
VS Code. However, you may plan to collaborate with developers that do
not use this editor. For instance, they might want to use our mode
for GNU/Emacs, which is located here. Then, we advise you
to let SuperBOL Studio store the configuration in a superbol.toml
file that will be located at the root of the project.
You can make the extension write your current project configuration
into a superbol.toml by entering the command palette (View > Command Palette…, or press
Ctrl+Shift+P), and then selecting the
command SuperBOL: Write Project Configuration.

This will save a superbol.toml file at the root of each currently
opened project directory. Such a file will not store any
user-specific settings, so you can now safely put them under source
control. Extensions dedicated to the edition of TOML files, such as
tamasfe.even-better-toml,
provide the same level of assistance as when you edit
.vscode/settings.json.
Further documentation
You can check further the documentation on using the extension on this page.
Mode for GNU/Emacs
You can find here a mode that allows you to use the SuperBOL LSP server with GNU/Emacs.
Building from sources
If you build from a clone of the git repository, make sure to update submodules:
git submodule update --init --recursive
You first need to install a few external dependencies to build the LSP server and the VSCode extension from sources.
-
First, you need to install and initialize opam;
-
Then you need a recent version1 of our build tool drom. The easiest way to have it running is via the following command:
opam pin add https://github.com/OCamlPro/drom.git -
Install node.js (version >=5.2.0) if it is not already installed.
-
You can then install all remaining dependencies, and compile the LSP server along with the VS Code extension:
make build-deps vsix-release
Resources
- Website: https://ocamlpro.github.io/superbol-vscode-platform
- General Documentation: https://ocamlpro.github.io/superbol-vscode-platform/sphinx
- Sources: https://github.com/ocamlpro/superbol-vscode-platform
-
Current version is 0.9.2~dev3 (commit 63a5770). ↩︎